Thursday, 31 July 2014

I'm back


Dear Reader, I have been away on an extended period of leave from Fix Up Look Chic. I have had a few months refilling my creative store, and making sure I still had interesting things to say and tell you all about. I hope you'll all forgive me for the prolonged period of radio silence, but as a reward for being so patient I have been up to some amazing stuff for the past few months, things I can't wait to share with you.

So, let FixUpLookChic ride again! School's out, Summer is well and truly here.


Sunday, 11 May 2014

My Favourites from the Met Gala

How many of you stayed up the other night, constantly refreshing twitter as the images dripped through from the Met Gala Ball Red Carpet?

Suki Waterhouse photo

Arizone Muse Photo
Blake Lively Photo
and for me, the winner had to be...

Taylor Swift Photo
Initially rather underwhelmd with the theme of White Tie and Diamonds, it did appeal to my sense of nostalgic romance with many a guest paying homage to Charles James.  I'm clearly an old romantic at heart, which seemed to come out when talking to Navaz (Disneyrollergirl) the other week with Mastered.com, my style as a stylist seems to come under the moniker of Modern Classic, Romantic and Pastoral. It might have something to with preferring the West Country to London, and I always feel more comfortable styling a Tim Walker esque, fantastical shoot. My projects always come back to a romantic yearning for the great outdoors whether it's flower topped wellies or practical outdoor embellishments. Anyway, enough about me...

Charles James Ball Gowns, 1948
Courtesy of The Metropolitan Museum of Art, Photograph by Cecil Beaton, Beaton / Vogue / Condé Nast Archive. Copyright © Condé Nast
Charles James: Beyond Fashion is a look back at the groundbreaking designer's work on ball gowns in the 1940s and 1950s, shaking off the mantle of the war years, where fabric had been at a premium and tight silhouettes were the order of the day to save money, James' voluminous yet mathematically structured ball gowns summed up the New Look of the day, alongside Dior's New Look Collection of 1947.

James approached the female form as an anatomical specimen, and aren't we the better for it!

More than ever, this has made me want to hop on a plane to NYC and drool over the exhibition's many sketches, fabric samples, technical drawings and, of course, the real thing!

Friday, 9 May 2014

Disney Roller Girl Day with Mastered.com

Disneyrollergirl

I spent the day with Navaz Batliwalla aka Disneyrollergirl as part of one of Mastered's online courses for modern creative development. 

some of Disneyrollergirl's work with brands

Navaz launched the blog in 2007 as an 'anonymous fashion insider' and gave her opinion on all things aesthetic and driving the fashion/art world. It was awesome to sit down with her, with just one year's experience of blogging under my belt, and talk about the next steps for FixUpLookChic. The chat was all in aid of Mastered's course about how to turn your fashion blog into a money making commodity and how to work with brands. Of course blogging is ultimately for the love of it, and is a place where a writer can empty their head and share their thoughts with the reader. 
with Frances and Navaz

No one can underestimate the power of the individual armed with a laptop and some high speed broadband in the comfort of their own home.


These days, that is all you need to take over the world, one post at a time, and why shouldn't it make you some money/contacts in the process? 

Also lucky enough to be a guinea pig like me was the lovely Frances who's blog Last Year Girl is a vintage fashion focussed blog, writing about Vintage books, exhibitions, styles and key items that have found their way back into our modern fashion psyche.

Wednesday, 7 May 2014

Fashion Fix 1st Birthday: Revisiting the Burberry Aztec Beaded Yoke


It's time to have a look back at some of my favourite summer fashion fixes of the past year. I've now been working on this blog for a year and as my readership has grown continually through the years, I know some of your newer FashionFixers won't have seen some of the gems that lie in the early end of this blog. 


Photo Amanda Thomas

One of my favourite trends of 2012 was Burberry's tribal inspired beaded yoke adornment on their Spring/Summer Collection. I really think this is a unique addition and surprisingly wearable in the everyday as the gorgeous Eva Lazarus models for us below. 

You will need:

  • pattern paper
  • 3/4 metre cotton fabric
  • 3/4 metre lining fabric
  • sewing machine and matching thread
  • 1/2 metre matching ribbon
  • dressmaking pins
  • dressmaking scissors
  • fimo in assorted colours
  • oven
  • needle and thread

How to do it:
  1. Measure you collar size and add 5 cm, draw this circle on pattern paper. Measure out 17 cm from this line and draw a larger circle, fold in half, press and unfold again. Above the neck opening on the inner edge, measure out 2 cm either side of the centre fold and cut out a segment of the pattern. Cut down the centre fold below the neck opening  leaving you with half the pattern.  Lay onto the fold of the fabric, pin in place and cut out two collar pieces, making sure you include a 1cm seam allowance with both.
  2. Sew ribbon onto both sides of one collar piece.
  3. place the collar pieces right sides together, tucking the ribbons inside. pin in place
  4. using a running stitch sew all the way around, 1cm from the edge, leave a gap at one end to pull through.
  5. Pull the collar through, hand sew the opening closed.
  6. Draw a template of your yoke on pattern paper and mark out your bead design. use this as a reference to make your beads out of Fimo. Make sure to score holes in the beads before you bake them. hand sew them on in thread that matches the yoke fabric


In the studio, working out the pattern after a night of Fimo baking!

Eva Lazarus modelling the yoke, shot by Amanda Thomas, Makeup Jo Williams, Styling Harriet de Winton


Sunday, 27 April 2014

Fashion Fix: How to interface a neckline

Photo Amanda Thomas
Here at Fix Up Look Chic I am very proud to show you my ideas that I first came up with for Cloth Magazine but I am most excited about what lies ahead as this is a fashion and style based craft blog.

One of my favourite tops has been another made from using an existing garment as a pattern. I really think it is such a clever idea as the risk element is diminished, seeing as the new item of clothing is going to replicate one of your tried and trusted wardrobe staples.

However, it is hard to give a step by step guide as each garment is unique. As I did with the blue leopard print sleeveless top, I can describe the methods I sued and be able to chuck in a masterclass - that time about inserting a zip.

This time I hope that I can show you haw to interface a neckline.

You will need:
  • calico to make pattern pieces
  • iron
  • dressmaking pins
  • dressmaking scissors
  • paper scissors
  • fabric (check you old garment's label for fabric info and then take it with you to the shop to work out how much you need.)
  • bias binding for edges
  • fastenings (I needed a zip, but decided to make a feature of it so got a gold chunky one).
  • thread 
  • fabric marker
  • zip foot.
  • interfacing
  • iron
I got all of these things from Fabricland

How to do it:
  1.  Take a deep breath and cut your old garment along each seam to have individual pattern pieces.
  2. iron each piece flat
  3. pin each piece onto calico and cut out leaving a 1.5cm seam allowance. 
  4. label each piece so you remember where they go!
  5. pin to your new fabric and cut out the new pieces. You will now have a collection of fabric pieces complete with seam allowances.
This is the point where our paths part. Each garment is going to be made in its own way, so I can only tell you how I went about reconstructing my garment. 

I want to take this opportunity to talk about how to interface a neckline. Facing a neckline basically means cutting out a strip of fabric that follows the same curve as your neckline that is stitched to the raw neckline edge and folds over inside the garment.

  1. To cut your facing strips, lay out your facing fabric right side up, turn your garment inside out and place on the fabric. Use the neckline as a template for one side of your curve, then measure out 5cm and mimic a similar bigger curve to create a facing strip. Make sure you leave seam allowance at each end. Repeat for front ant back. Mark the shoulder seams. 

  2. Iron on interfacing onto the wrong side of your strips to strengthen the fabric.
  3. Match the strips up at the shoulder seams, pin together and machine a running stitch. Press the seams open. 
  4. The lower edge of the facing just hangs free so it needs to be edged to stop it fraying. If you haven't got an overlocker, use a zigzag stitch or simply cut with pinking shears.
  5. Stay Stitch the upper edge of the neckline facing. This stitch helps prevent the neckline from bunching up when you put it together with the garment.
  6. Pin the facing to the neckline, right sides together. Match up the shoulder seams and centre front to begin with and the rest should fall into place.
  7. Once all matched up, machine a small stitched (1.5mm) running stitch around the top of the neckline.
  8. Trim the raw edges down to reduce the circumference of the curved edge. On any particularly extreme curves it's also helpful to make little snips into the seams up to the stitched line. 
  9. press the seams upwards (away from the garment). Machine a running stitch very close to the seam line, to help the facing roll to the inside of the garment and to keep the seams flat.
  10. Give the fabric a bit of a tug either side of the seam line to smooth things out.
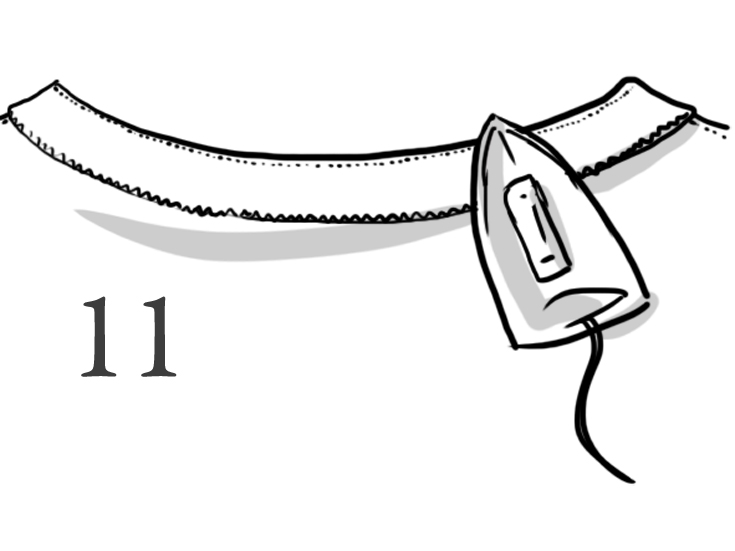
  11. Turn the facing to the inside. roll it into the inside by a couple of extra mm so the seam line is visible from the inside but not the outside.  Press in place.


Friday, 25 April 2014

Styling: The Elements Exhibition 2014 by Simon Withyman

Water
Photo Simon Withyman
Last year I styled a few images from a series collection by photographer Simon Withyman based around the elements. This 'Water' shot above inspired him to complete the set. I styled 'Air' and 'Earth'. Here is the complete collection with a few behind the scenes shots

behind the scenes on 'Air' Model Victoria Coutts,  assistant Carly Wong
Air
photo Simon Withyman

We achieved the light touch of movement in the background with vigorous shaking of the chiffon backdrop but Carly and myself. Hence, none available to take a behind the scenes shot of that!
Earth: Carly assisting again and Sarune modelling 
Earth
Photo Simon Withyman

Fire
Model Donatella Lilian Hazel Pegler, Photo Simon Withyman

Wednesday, 23 April 2014

Reading Room: The Edible Atlas by (my mate!) Mina Holland

Photo Paul Salischiker
I can't wait to see my old uni pal Mina Holland tonight in town. You may recognise those cheekbones as she was contributing Editor of Observer Food Monthly,  now covering maternity leave as Editor of Guardian Cook, AND now a published, celebrated author of  The Edible Atlas (Canongate, 2014).

As this is a style Blog, what makes me most happy is how bloody gorgeous and cool she looks in this photo. Love blunt cut hair at the moment, particularly because i could only dream of such a thing with my lion's mane. 


The Edible Atlas Cover, Canongate

Here's what she says about the book;
'A book for intrepid cooks, I explore the what and why people eat as they do across the world, demystifying the flavours, ingredients, techniques and dishes at the heart of thirty-nine different cuisines. With fully adaptable recipes to suit beginners and confident cooks alike, learn to recreate dishes from across the globe. Weaving snippets of anecdote, history and literature in with recipes and words of wisdom from some of the world’s most seasoned food experts – such as Yotam Ottolenghi and Jacob Kenedy, Jose Pizarro and Giorgio Locatelli - The Edible Atlas is as comfortable in your kitchen as it is at your bedside.'  Mina

and here's what some other rather well known chefs and food writers say...

  • "A fascinating project, telling some fantastic stories about a broad range of cuisines. Mina’s style is engaging and illuminating and the food cries to be cooked."YOTAM OTTOLENGHI
  • "The Edible Atlas is not only a delight to read but also peppered with delicious recipes, facts and flavours from around the world"RACHEL KHOO
  • "The Edible Atlas deserves a place on every serious cook’s bookshelf. Intelligent, informative, entertaining and very handsome. Mina Holland’s prose is as engaging as her recipes. She is an exciting and authoritative new voice in the world of cookery and food writing."RUSSELL NORMAN
  • "Mina has managed to present world cuisine on a plate in this marvellous book."JOSÉ PIZARRO


back in HiFi, Leeds, both looking a little less sophisticated